For thirty years I ran a cafeteria line that fed 600 kids a day, and if there is one thing that setup taught me, it is that nobody digs through a bin for what they want. Everything had a slot, every slot had a label, and the line never backed up. Then I retired to Tucson, moved in with my daughter's family of five, and watched our regular refrigerator turn into exactly the kind of mess I spent three decades preventing. Sodas wedged behind leftovers, juice boxes buried under a rotisserie chicken, my son-in-law's beer taking up a whole shelf on its own. Every dinner started with someone standing in front of an open fridge for a full minute, letting the cold air out while they hunted.
We fixed it with a hOmeLabs Beverage Refrigerator and Cooler, the glass-door unit that holds up to 120 cans and gives you adjustable, removable shelves to work with. It has been living in the corner of our kitchen for eight months now, and the difference is not just that drinks stay colder. It is that everyone in the house, including a nine-year-old, can walk up and find what they want in about three seconds. This guide is the exact system I built into that hOmeLabs fridge, shelf by shelf, so you can copy it in yours.
Stop losing the good real estate in your main fridge to soda cans.
The hOmeLabs Beverage Refrigerator holds 120 cans behind a glass door with fully adjustable shelves, so drinks get their own dedicated space and your main fridge gets its shelves back.
Amazon Check Today's Price on Amazon →Step 1: Map your household's drink habits before you load a single can
Before we put anything in the hOmeLabs fridge, I sat down for ten minutes and wrote out who drinks what, and how often. My daughter and son-in-law each start the day with sparkling water. The two teenagers go through soda and energy drinks after school. The nine-year-old needs juice boxes at a level she can reach without climbing on anything. My son-in-law keeps a six-pack of beer around for weekends. That list became the blueprint for every shelf assignment that followed, and it is the step people skip when they just start cramming cans in wherever there is room.
The hOmeLabs unit has five shelves total, and because they are adjustable and removable, you are not locked into whatever spacing it shipped with. I pulled two shelves entirely on the first day just to see what fit, then put them back once I figured out the right gaps for cans versus bottles. Measure your tallest bottle before you finalize shelf heights, a 2-liter soda bottle or a bottle of white wine needs more clearance than a standard 12-ounce can, and you do not want to discover that on grocery day with a full bag in your hands.
I also thought about reach height for the shortest person using the fridge. My granddaughter is nine, and putting her juice boxes on the bottom shelf meant she had to crouch and dig blind. Moving them to the middle shelf, right at her eye level, meant she could see every juice box option the second the door opened. That one change alone cut out most of the "which one has less sugar" back-and-forth we used to have every afternoon.
Once the household list was written out, I taped a small index card to the side of the hOmeLabs cabinet listing exactly which shelf holds what, the same way a cafeteria line posts a station map for a new hire. It stayed up for about a month, long enough for everyone to memorize the layout on their own, and then I quietly took it down. Nobody even noticed it was gone, which told me the system had actually stuck rather than just being followed off a cheat sheet.
Step 2: Zone the shelves top to bottom by temperature sensitivity and grab frequency
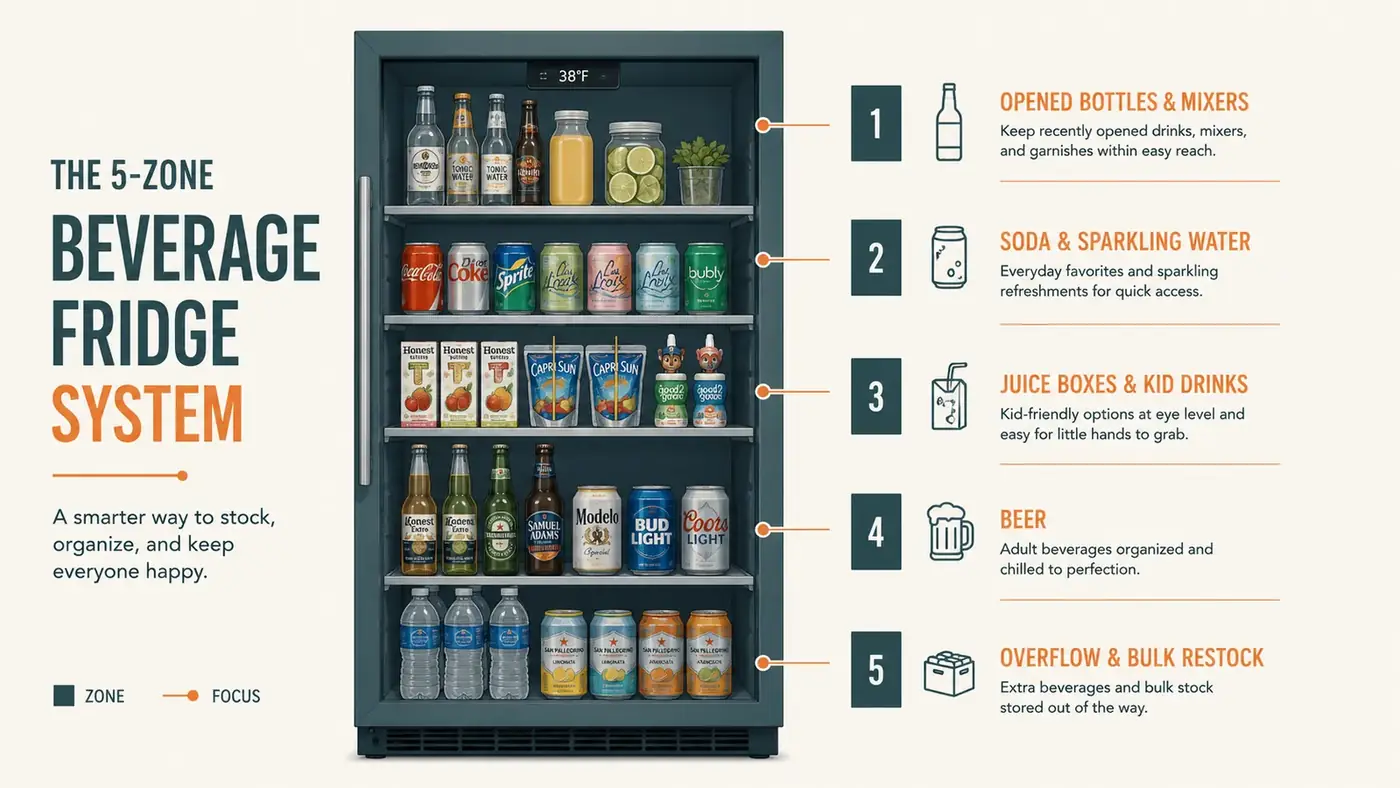
Once I knew who drank what, I zoned the five hOmeLabs shelves by two things at once: how cold something needs to be, and how often someone reaches for it. The top shelf, which runs slightly warmer since heat rises even inside a compact fridge, became home for opened bottles of wine and mixers that do not need to be ice cold, things like tonic water and cocktail syrups my daughter uses maybe twice a month.
The upper-middle shelf is the busiest real estate in the fridge, so that is where soda and sparkling water live, since those get grabbed multiple times a day by three different people. The middle shelf holds the juice boxes and kid drinks, positioned at that eye-level height I mentioned. The lower-middle shelf holds my son-in-law's beer, which runs colder toward the bottom of the unit anyway, which is exactly how he prefers it. The bottom shelf is overflow and bulk restock, the unopened 12-pack waiting to get broken down into the upper-middle shelf once the current stock runs low.
This zoning matters more in a beverage fridge than a regular refrigerator because you are not also managing raw meat or dairy safety zones, so you have the freedom to zone purely by convenience and temperature preference. I would not have thought to do this before running that cafeteria line, where the cold zone and the grab-and-go zone were always separate for a reason, but it translates directly to a home kitchen once you start thinking about it the same way.
With a 120-can rated capacity, I roughly split the hOmeLabs shelves into portions instead of trying to fill every inch. Soda and sparkling water get the largest share since they turn over fastest, beer gets a fixed weekend-sized allotment, and juice boxes get a smaller dedicated run since one box only lasts my granddaughter a single sitting. Leaving a little breathing room on each shelf, rather than packing it edge to edge, also lets cold air actually circulate around the cans, which is part of why the whole fridge cools evenly instead of leaving warm spots in the back corners.
Step 3: Use small bins to group anything that is not a standard can
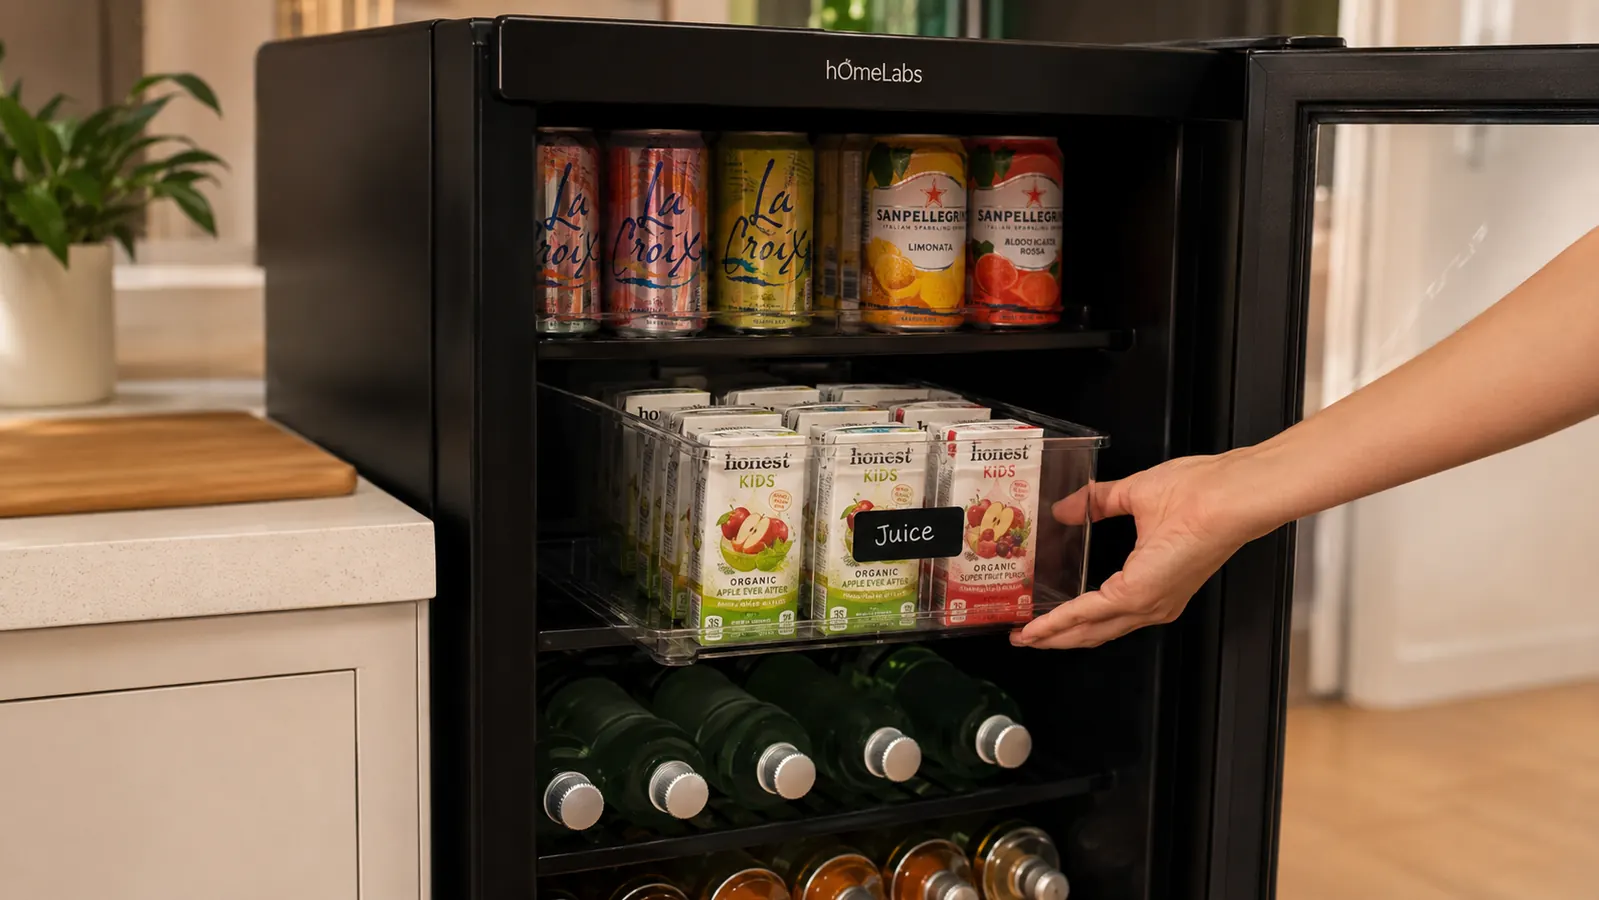
Cans stack and self-organize fine on their own, but bottles, juice boxes, and anything oddly shaped tip over and roll the second someone grabs the item next to it. I bought four small plastic bins, the kind meant for pantry organizing, and dedicated one to each category that was not a straight can: juice boxes in one, kids' pouches in another, small mixer bottles in a third, and a fourth for the handful of glass soda bottles my daughter likes.
The bins slide in and out of the hOmeLabs shelves as one unit, which means restocking takes thirty seconds instead of five minutes of individually placing each juice box back in a row. When it is time to buy more, I just pull the whole bin out, refill it at the counter, and slide it back in. It also means a nine-year-old reaching in for a juice box is grabbing from a contained bin instead of knocking three other things over trying to get one out from between cans.
Label each bin. I used a simple label maker, but painter's tape and a marker works just as well. The label is not really for the adults, who already know the system, it is for guests, for the teenagers' friends who come over, and honestly for me on a day when I am not thinking clearly and just want the fridge to tell me where things go. I also chose clear bins over solid-colored ones on purpose, since a clear bin lets you see at a glance whether it needs a refill without pulling it out of the hOmeLabs shelf first.
Step 4: Sort the door shelf by height, not by category
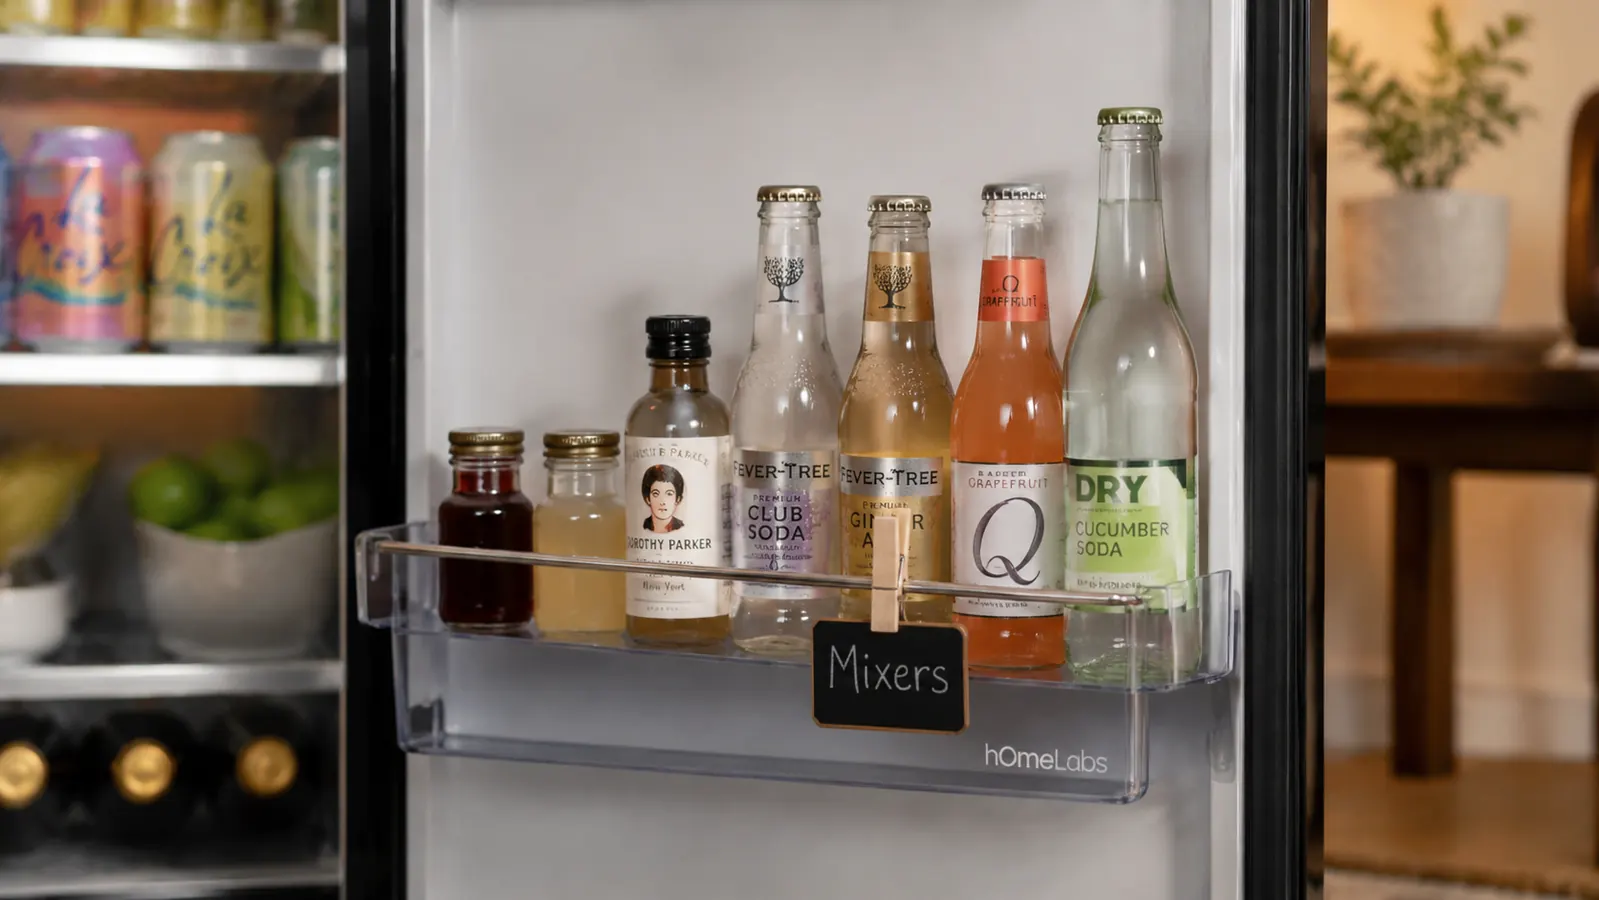
The door-mounted shelf on the hOmeLabs unit is the one spot where I broke my own zoning rule and organized purely by physical height instead of drink type. Small bottles and mixers, cocktail bitters, hot sauce that somehow ended up living in the beverage fridge instead of the pantry, all lined up shortest to tallest from left to right. This is the same trick I used lining up condiment bottles on a cafeteria prep line, because a shelf sorted by height lets you see every single item at a glance instead of tall bottles hiding short ones behind them.
Door shelves also run warmer than interior shelves in any compact fridge, hOmeLabs included, since they are the first thing exposed to room air every time the door opens. That makes the door the wrong spot for anything that needs to stay properly cold, but the right spot for condiments and mixers that just need to be cool and out of the pantry heat. Keep that temperature difference in mind before you decide what lives where.
I clipped a small chalkboard tag to the edge of the door shelf with the current inventory written out, mostly so I would notice when we were down to the last bottle of tonic water before we actually ran out mid-cocktail on a Friday night. It takes ten seconds to update and has saved more than one last-minute grocery run.
Step 5: Build a rotation habit so nothing goes flat or expired in the back
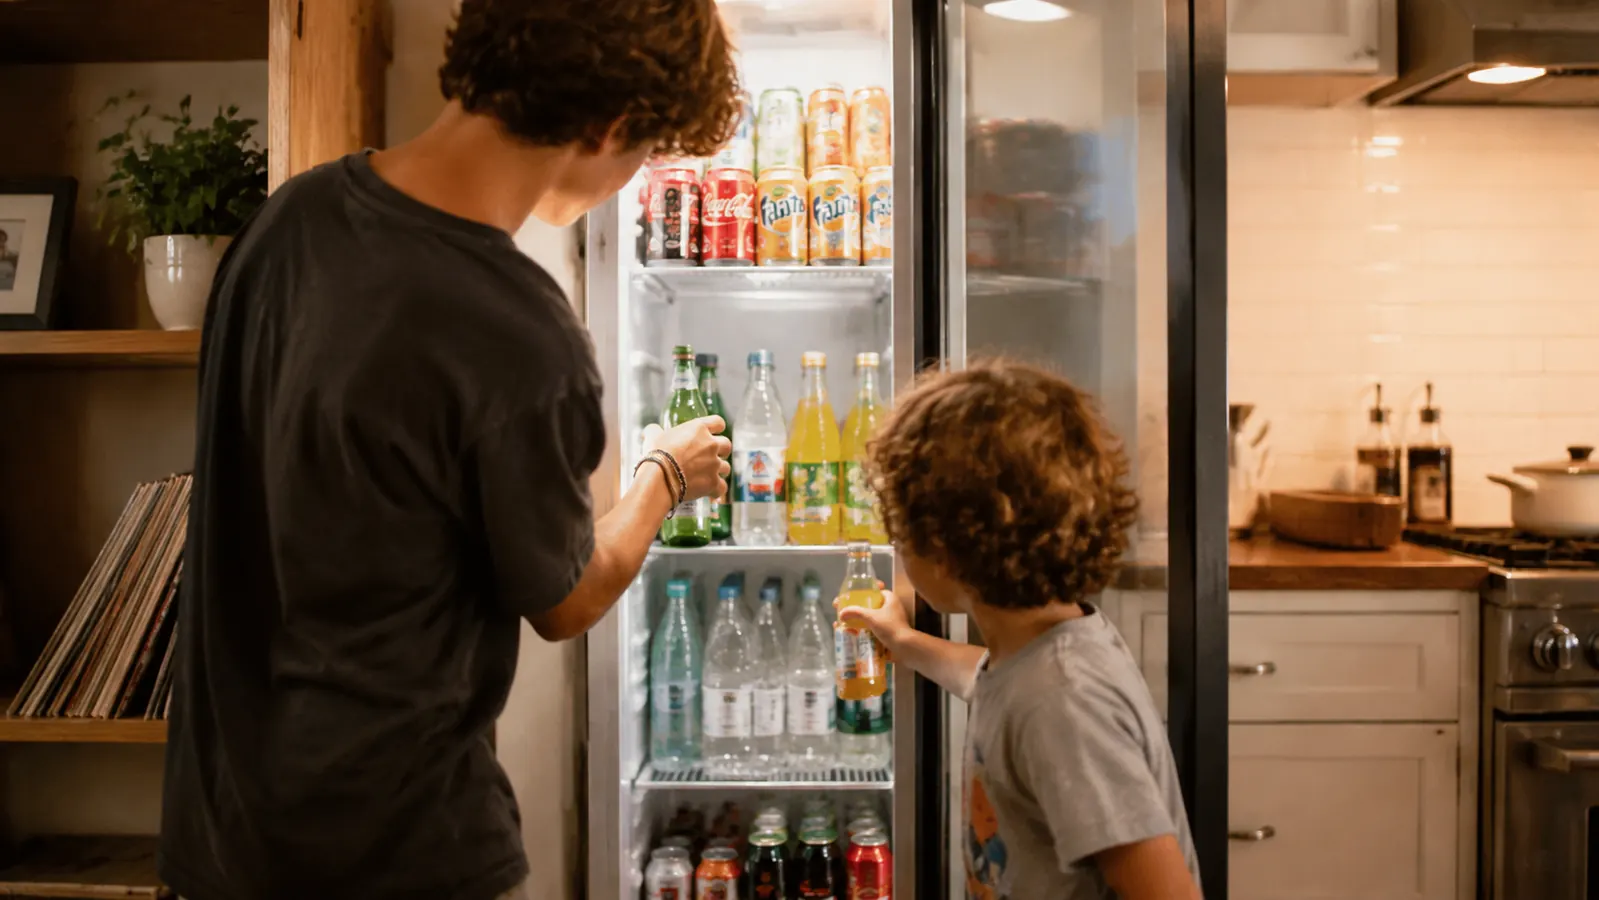
Organizing the shelves solves the finding problem. Rotation solves the freshness problem, and it is the step most households skip entirely. Every time I restock the hOmeLabs fridge, new cans and bottles go to the back of their zone, and whatever was already there gets pulled forward. It is the same first-in-first-out habit every cafeteria kitchen runs on, and it takes maybe an extra fifteen seconds per restock.
Without rotation, sparkling water and soda do not really go bad, but they do go flat over months of sitting untouched behind fresher cans, and the household ends up drinking flat, months-old soda from the back while a fresher case sits ignored in the pantry. Once we started rotating, that stopped happening within the first two weeks.
I also built a simple weekly check into Sunday grocery planning: open the hOmeLabs door, scan the five shelves and the bins, and note anything running low before we make the store list. It takes under a minute because everything has a spot and an empty spot is obvious at a glance, which is really the whole point of organizing it this carefully in the first place.
What Else Helps
A few small additions made the system stick past the first month. A dry-erase marker taped to the side of the hOmeLabs fridge lets anyone jot a quick note directly on the glass door, out of soda, need more beer, that kind of thing, and it wipes clean in a second. I also keep one bin permanently empty and labeled restock overflow, so if a grocery trip brings home more than fits in its regular zone, there is a designated spot for the extra instead of someone just shoving cans wherever they fit and undoing the whole layout.
If more than one person in your house restocks, walk them through the zones once, out loud, standing in front of the open door. It sounds excessive for a beverage fridge, but it is the same reason a cafeteria line trains every new hire on where things go before their first shift. A system only works if everyone who touches it understands it the same way, and that takes about two minutes of explanation, not a written manual.
Around holidays, we do a quick temporary reshuffle of the hOmeLabs shelves, since a Thanksgiving crowd drinks differently than a normal Tuesday. The overflow bottom shelf becomes a guest zone for a couple of days, stocked with whatever a dozen relatives might reach for, and it reverts to bulk restock the moment the extra guests head home. Treating the layout as adjustable rather than permanent has made it easier to keep using long term, instead of abandoning the whole system the first time a holiday broke the routine.
A fridge with a system is not really about tidiness. It is about nobody standing in front of an open door for a full minute letting the cold out while they hunt.
Give every drink in the house its own spot, and give your main fridge its shelves back.
The hOmeLabs Beverage Refrigerator and Cooler holds 120 cans behind a glass door with adjustable, removable shelves built for exactly this kind of zoning.
Amazon Check Today's Price on Amazon →